Home Top Ad

Responsive Ads Here

How to send a new email? If you need to send mail to someone with your Gmail ID, follow the steps below. Step 1: - After logging in to Gmail...

How to send a new email?

If you need to send mail to someone with your Gmail ID, follow the steps below.

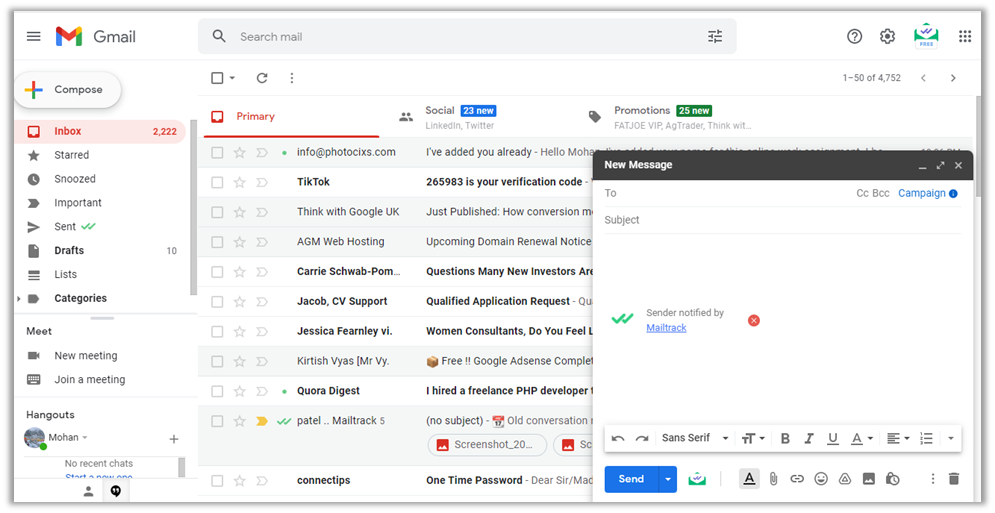
Step 1: - After logging in to Gmail, the Gmail Dashboard will open as shown in the picture below.

Step 2: - Click on the + Compose button on the left side as seen in the picture below. 

‌Step 3: - + After clicking on Compose, a dialog box opens at the bottom right. In that box you have to send the Mail address to be sent to To field, Subject to the subject, Behavior in Mail body and some documents along with the said mail then click on Attach files, document from computer and click on Send button  

Step 4: - Click on Attach files to attach the document as shown in the picture above. 

Step 5: - Then open dialog box opens. You have to select the file to be sent from the computer and click on the Open button. 

Step 6: - The file starts uploading. Finally click on the send button. 

Step 7: - Then the message Sent information appears on the screen. You need to go to the Sent menu on the left side to see the mail sent. 

How to send mail from mobile: -

Step 1: - Open the Gmail app.

Step 2: - Gmail Dashboard opens. You can view emails in the inbox. Tap on the Compose button at the end. 

Step 3: - You have to write the email address of the person to be sent to To field. In the Subject, type the information to be sent to Compose email and tap on the send option after the attach files at the top of the dashboard as shown in the picture below. 

Step 4: - If you need to send any document along with the message, tap on the Attach button next to the Send button. Then two options appear. From there, tap on Attach file. 

Step 5: - Select the file you want to send and tap on that file. 

Step 6: - The file appears to be attached to the mail. Then tap on the Send button. 

In this way you can write information in gmail and attach the file and send it to gmail.


How to view incoming emails? Follow these steps to see if someone has sent a mail to your Gmail ID. How to open Gmail on a computer and view...

How to view incoming emails?

Follow these steps to see if someone has sent a mail to your Gmail ID.

How to open Gmail on a computer and view emails: -

Step 1: - First open any of the web browser (Google Chrome, Microsoft Edge, Mozilla Firefox etc) on the computer.

Step 2: - Type www.gmail.com or mail.google.com in the address bar of Web Brower and press Enter button. If you are not logged in to the computer, the following picture opens. In which you have to click on Login.

Step 3: - If your Gmail account is already logged in, the Gmail Dashboard of Gmail login opens as shown in the picture below. 

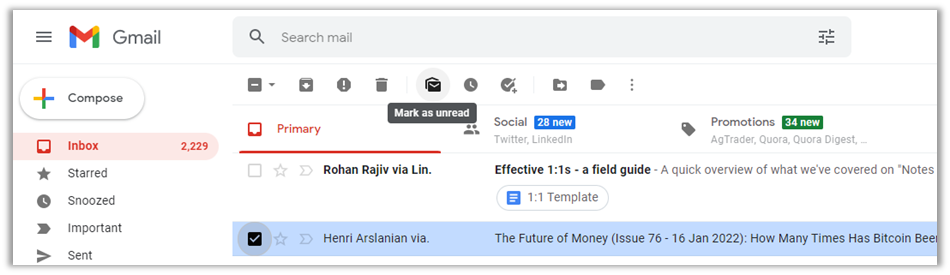
Step 3: - Inbox appears as shown in the picture above. You can see the mails sent by people in it. Click on the mail from the person whose mail it came from. Like I click on AGM Web Hosting. Looking at the end of the page, it seems that a document has been attached to the mail. Click on the Download button to download the attached document. 

Step 4: - You can download and view the documents in the mail sent to you. Files downloaded in this way go inside the download folder. Go to that folder and you can see the downloaded file.

How to Open Gmail on Mobile and View Email: -

Step 1: - Open the Gmail app.

Step 2: - Gmail Dashboard opens. You can view emails in the inbox. 

You can open the mail by tapping on the mail. This way you can open the mail by looking at the mail.

How to email a scanned file from CamScanner App? You can email the scanned file to android mobile using CamScanner app. Follow the steps bel...

How to email a scanned file from CamScanner App?

You can email the scanned file to android mobile using CamScanner app. Follow the steps below to email.

Step 1: - Open CamScanner app.

Step 2: - Scan. Then tap the share image before the three dots as shown in the image below.

Step 3: - You can email the file in PDF or JPEG (Image) format. If you email in PDF then tap on Share PDF or if you email in JPEG then tap on Share JPG. I tap here Share PDF. 

Step 4: - Tap on the Share option at the top right of the Mobile screen. 

Step 5: - Tap on Gmail icon from the options seen on Mobile Screen. You can use other options as shown on the screen. 

Step 6: - The scanned file appears to be attached in Gmail. From the email you logged in to Gmail appears. Enter the email address to send to. Then tap on the Send button at the top right. 

This way you can even email the scanned file using the CamScanner app.

How to scan from CamScanner on Android Mobile: - Now that the CamScanner app is installed on your mobile, you can scan documents from that a...

How to scan from CamScanner on Android Mobile: -

Now that the CamScanner app is installed on your mobile, you can scan documents from that app. You can save the scanned file in PDF or JPEG (Image) format.

Step 1: - Open CamScanner app.

Step 2: - Tap on the image that looks like a scanning camera on the far right side of CamScanner. 

Step 3: - The camera of the mobile opens, place the camera of the mobile just above the page to be scanned. Adjust the sheet on the mobile, tap on the image that looks like the camera at the end of the app. 

Step 4: - Then you can use the four corners to increase or decrease the required part in the photo. 

Step 5: - Then tap on the Last Next button. 

Step 6: - The effect setting is used in the photo itself, then tap on the tick mark (). 

Step 7: - A photo is scanned. To scan other photos, tap on Tap to add Pages or tap on the last camera image. I even scan the second sheet here. 

Step 8: - Repeat the above procedures while scanning the second sheet.

Step 9: - This way you can see the two sheets scanned. Now if you need to scan other sheets, scan them. 

Step 10: - After scanning the sheet as required, the said files should be saved in the gallery of the mobile. To do this, tap on the three vertical docs in the upper right as shown in the picture above.

Step 11: - Then tap on the Save to Gallery option from the options shown in the picture below to save the file. 

A popup message appears on the screen of Saved to Gallery. This way you can scan on android mobile using CamScanner app.

How to Gmail by scanning from CamScanner (Mobile App) The camera on the mobile works as a scanner. For that, Mobile should have Camera app o...

How to Gmail by scanning from CamScanner (Mobile App)

The camera on the mobile works as a scanner. For that, Mobile should have Camera app or other scanning apps. There are many types of scanning apps available in the Play Store. But here I have provided information on how to install the popular software CamScanner app on mobile and how to email the file scanned from that app.

How to install CamScanner on Android Mobile: -

Step 1: - Open Play Store app. 

Step 2: - Search by typing CamScanner in the search box of Play store app. 

Step 3: - Tap on Install. 

Step 4: - Then start installing. 

Step 5: - Once installed, the app appears on the home screen of the mobile. 

Step 6: - Open the app.

Step 7: - Tap on Use Now button. 

Step 8: - The first time you open the app, it asks permission to access the photos on your mobile, so tap on Allow button. 

Step 9: - Tap on the image that looks like a scanning camera on the far right side of CamScanner. 

Step 10: - Then CamScanner asks permission to take photos and videos from your mobile, so tap While Using this app. 

Now the home screen of CamScanner app appears. This way you can successfully install CamScanner app on android phone.


What is email? Electronic Mail or Email is one of the most used services on the Internet. This service can be used to communicate electronic...

What is email?

Electronic Mail or Email is one of the most used services on the Internet. This service can be used to communicate electronically between people with email addresses. This service is similar to postal mail, but its speed is very fast. Since messages are sent electronically from it, printing is required to receive it physically. Messages can be mainly typed letters, pictures, audio material, movies, etc. This service is mostly free. Email requires a computer, the Internet, and an email program. Email service can be used from computer as well as mobile.

Unlike real correspondence, it can receive unwanted emails. This is called spam in email. Such spam should be identified and destroyed. Gmail, Outlook, Yahoo companies also provide the facility to send emails using the website.

The full form of Gmail is "google mail". Just as we use a post office to send information or news from one place to another, so we use email services to send emails from one place to another, and Gmail is an email service to send emails from one place to another on the Internet. Works like a post office. Gmail is a Google service. Gmail is not just a service for providing email services on the Internet, there are many other services as well. There are many types of services like yahoo mail, hotmail etc. on the internet from which email can be sent.

Just as the June difference is in a letter and a post office, so is the difference in email and Gmail. Email is where we write messages or news and Gmail is the medium through which that message or news can be sent from one place to another.

How to create a Gmail ID?

Your mobile and computer must have an Internet connection to create a Gmail ID. If not, connect to the Internet and follow the steps below.

How to create a Gmail ID using a computer: -

Step 1: - First open the web browser (Google Chrome, Microsoft Edge, Mozilla Firefox etc) on the computer.

Step 2: - Type www.gmail.com or mail.google.com in the address bar of Web Brower and press Enter button. 

Step 3: - Click on Create an account button. If the account is already logged in, as seen in the picture below, the Gmail dashboard of Gmail login opens. 

Step 4: - After clicking on Create an account, the form opens to fill in your details. Click on Next button to fill in the details. As shown in the picture below, if your page is open in Nepali and you find it easy, fill in the details on the same page. Otherwise you must choose English as the language at the bottom left to convert the page to English. 

Step 5: - After placing the language English (united kingdom) the following picture appears. In the details, put your First Name, Last Name, Username, Email ID that no one has chosen so far. Use Letters, Numbers and Symbols to keep a password that can be easily remembered later. Please keep the password as per the given criteria otherwise the password will not be accepted. Then click on Next button.  

Step 6: - As seen in the picture below, some details have to be added again. Such as your phone number, recovery email address, date of birth, gender. Phone number and Recovery Email address are not required but later if you forgot the password of Gmail account then the phone number and recovery email address will be useful for recovering the password. Therefore, it is advisable to keep it. After entering the details, click on Next button. 

Step 7: - Then to create a Google account you must Agree the Privacy and Terms. To do this go to the end of the page and click on the Agree button. According to the picture below. 

Step 8: - Your Gmail ID has been created. Now you can send and receive mail through Gmail. 

Note: Google is updating its system from time to time. As a result, there are small changes in the way Gmail accounts are created. Today and a few years ago, there was a difference in the way Gmail ID was created and it will happen later.

How to create a Gmail ID using Mobile: -

You can send and receive mail by creating Gmail ID even on mobile. For that you need to download and install Gmail app from play store or app store on your mobile phone. To do this, follow the steps below.

Step 1: - Open the Gmail app on your mobile.

Step 2: - No Gmail login in Gmail app. Welcome to Gmail message appears. Tap on the Skip button. 

Step 3: - Then tap on Add an email address button to add email address. 

Step 4: - As shown in the picture below, you can also keep the email addresses of other companies besides Gmail. But since I have to create an ID in Google's Gmail here, I tap on the Google option. 

Step 5: - Then tap on Create Account button. 

Step 6: - Three options appear. Tap on the For myself button. 

Step 7: - Write your first name and last name and then tap Next button..


Step 8: - Your A.D. Type in the date of birth and also select the gender and tap on Next button. 


Step 9: - Now you have to choose the username for Gmail and write according to Google's criteria. Username can be a mixture of letters, numbers, (dot) and dot (.). After entering the username, tap on Next button. 


If the email you selected is taken by someone else, Google will say "That username is taken." Try another. ” Gives information. So you have to choose another username. 

Step 10: - Use all the Letters, Numbers and Symbols and then keep the password easily remembered. Please keep the password as per the given criteria otherwise the password will not be accepted. Then tap on Next button. 


Step 11: - Now you need to verify your mobile phone. Enter the phone number and tap on Next button. 


Step 12: - Code comes on your mobile phone. Type the code and tap on Next button. 

Step 13: - Requests permission to add your mobile number to Google Account. If you later forgot your Gmail password then mobile number will come in handy. So it's okay to add. Tap on Next button. 

Step 14: - Google will review your account. Keep Gmail passwords confidential and secure. Keep a note of Gmail in your diary. 


Step 15: - Then agree to Google's Privacy and Terms. Go to the bottom of the page. Tap on the I agree button. 

Step 16: - Then another Google service is asked to backup to Google Drive. Accept that too. 

Step 17: - Your Gmail ID can be added. To open the mail, click on the mail and tap Take me to gmail. 

You can see the mail is open. This way you can login by creating a Gmail ID from the Gmail app on your mobile.

Note: Google is updating its system from time to time. As a result, there are small changes in the way Gmail accounts are created. Today and a few years ago, there was a difference in the way Gmail ID was created and it will happen later.